
You’ve bought a digital planner for your Onyx Boox. Now you need to get it onto the device and set it up properly so the hyperlinks work, the writing feels right, and you can actually start planning.
This guide walks you through the entire process — from downloading the file to navigating your planner with the stylus. It takes about five minutes, and once it’s done, you’re ready to go.
If you haven’t chosen a planner yet, read our guide on the best planner for Onyx Boox first.
Before You Start
Make sure you have:
Your Onyx Boox device charged and turned on
The planner PDF file downloaded (check your email for the download link after purchase)
A USB cable, or access to cloud storage on your device
The planner needs to be a PDF file. If you’ve been sent a ZIP file, extract it first on your computer to get the PDF inside.
Method 1: Transfer via USB Cable (Recommended)
This is the fastest and most reliable method.
Step 1: Connect Your Onyx Boox to Your Computer
Plug in the USB cable between your Onyx Boox and your computer. Your device should appear as an external drive, similar to a USB stick. On Windows it’ll show up in File Explorer. On Mac it should appear on your desktop or in Finder.
If your device doesn’t appear, try a different USB cable — some charging-only cables don’t support data transfer. You may also need to check the notification shade on your Onyx Boox and select “File Transfer” mode.
Step 2: Copy the PDF File
Open the Onyx Boox drive on your computer. You’ll see several folders. You can either:
Drop the PDF into the root folder (simplest)
Create a folder called “Planners” and put it there (neater long-term)
Drag and drop the file. It’ll transfer in a few seconds.
Step 3: Safely Eject and Disconnect
Eject the device from your computer before unplugging the cable. On Windows, right-click and select “Eject.” On Mac, drag the drive to the bin or click the eject icon in Finder.
Method 2: Transfer via Cloud Storage
If you don’t have a USB cable handy, cloud storage works well.
Step 1: Upload the PDF to Cloud Storage
Upload your planner PDF to Google Drive, Dropbox, or OneDrive from your computer or phone.
Step 2: Open Cloud Storage on Your Onyx Boox
Your Onyx Boox runs Android, so you can install cloud storage apps from the Play Store if they’re not already on the device. Open the app, find your planner file, and download it to the device.
Step 3: Find the Downloaded File
Once downloaded, the file will usually appear in your Downloads folder. You can access it from the Library section of your Onyx Boox or from the file manager.
Method 3: Transfer via Email
The simplest method if you just want to get started quickly:
Email the PDF to yourself
Open the email on your Onyx Boox (via the browser or an email app)
Download the attachment
This is the easiest method but can be slow for larger files. Most planners are under 50MB so it should work fine.
Opening Your Planner in NeoReader
Once the file is on your device, this is where the real setup happens.
Step 1: Find the File
Go to Library on your Onyx Boox. Your planner should appear in the recent files or in the folder where you saved it. Tap on it to open.
Step 2: Choose NeoReader
When you open a PDF for the first time, your device may ask which app to use. Choose NeoReader. This is the built-in reader that handles hyperlinked PDFs best. The Notes app is good for freeform writing but doesn’t handle tab navigation as reliably.
Step 3: Test the Hyperlinks
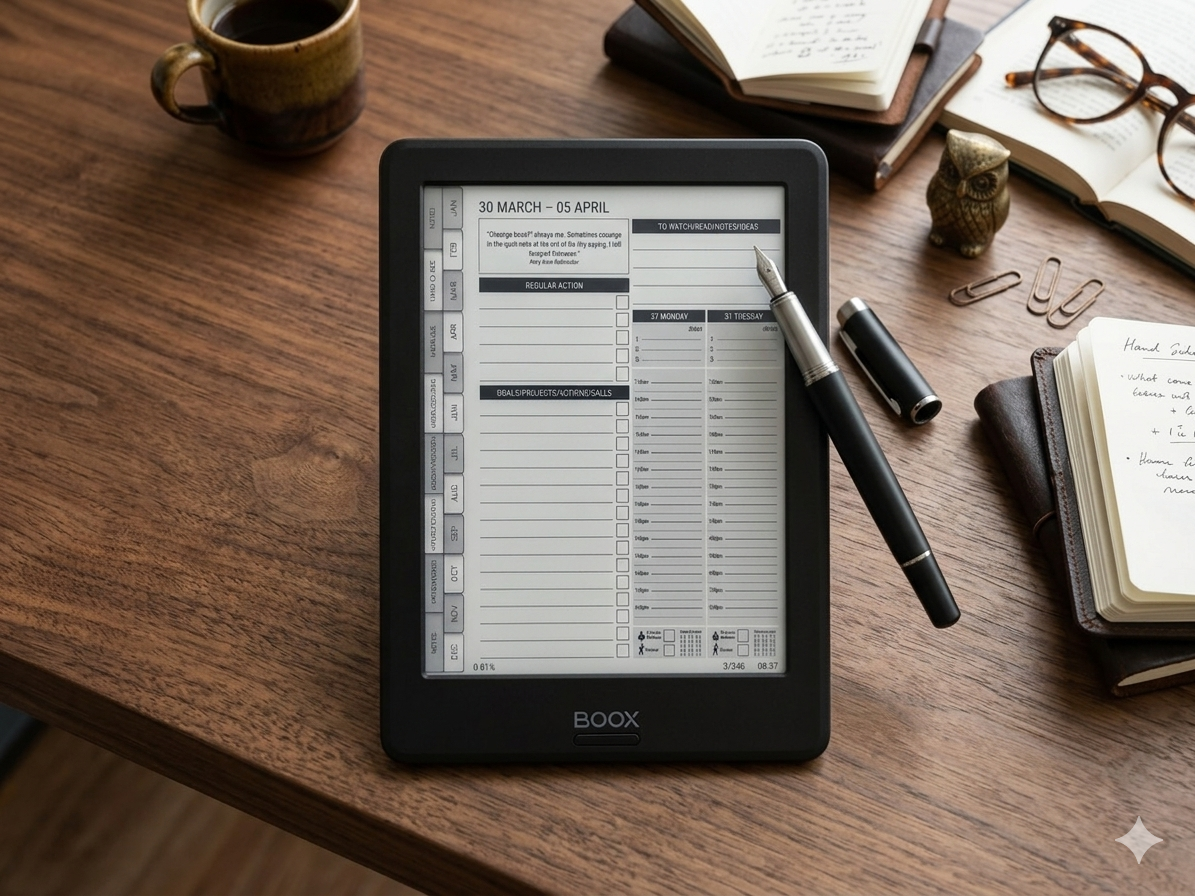
Once the planner is open, tap on the tabs at the edge of the page. They should jump you to different sections — monthly views, weekly spreads, daily pages, and any other sections your planner includes.
If the hyperlinks aren’t working, check that you’re in NeoReader (not the Notes app) and that the PDF isn’t a scanned image version. Proper hyperlinked planners use embedded links in the PDF, which NeoReader supports natively.
Setting Up Your Writing Preferences
Before you start planning, take a minute to configure your stylus settings. This makes a big difference to how natural the writing feels.
Pen Settings
In NeoReader, tap the pen icon in the toolbar to access writing settings:
Pen type — “Ballpoint” gives the most natural writing feel for planning
Thickness — start with medium (around 3–4) and adjust based on your handwriting size
Colour — stick with black for clarity on the e-ink screen
Eraser Settings
Set your eraser to “Partial erase” rather than “Stroke erase.” This lets you rub out individual characters rather than deleting an entire line with one tap.
Page Refresh
If you notice ghosting (faint marks from previous pages showing through), you can force a full page refresh. On most Onyx Boox devices, there’s a refresh button in the notification shade or you can set it to refresh automatically when turning pages.
Tips for Getting the Most from Your Planner
Use the tabs — don’t scroll through pages manually. The hyperlinked tabs are there to save you time.
Plan the night before — fill in tomorrow’s daily page in the evening so you wake up knowing what to focus on.
Keep it simple — 3 priorities per day, not 15. The writing space is for focus, not overwhelm.
Do a weekly review — spend 10 minutes at the end of each week reviewing what worked and planning the next one.
For a complete planning workflow on Onyx Boox, read our full guide on how to use Onyx Boox for business planning. It covers the monthly, weekly, and daily system step by step.
Troubleshooting Common Issues
Hyperlinks Not Working
Make sure you’re opening the planner in NeoReader, not the Notes app. If links still don’t work, the PDF may not be a hyperlinked version — check with the seller.
Device Not Recognised by Computer
Try a different USB cable (must be data-capable, not charge-only). Check your Onyx Boox notification shade and select “File Transfer” or “MTP” mode.
Planner Looks Blurry or Low Quality
This usually means the PDF resolution is too low for the screen. Quality planners are designed at high resolution specifically for e-ink. If yours looks blurry, it may not be optimised for Onyx Boox.
Writing Feels Laggy
Close any background apps running on the device. Onyx Boox runs Android, so apps can accumulate in the background and slow down writing response. A restart usually fixes this.
You’re Ready to Start Planning
That’s it — your planner is installed, your writing settings are configured, and your Onyx Boox is ready to become your daily planning tool.
If you’re still looking for the right planner, the MY PA Digital Business Planner for Onyx Boox is designed specifically for e-ink devices with full hyperlinked navigation, monthly goal-setting, weekly planning, and daily time-blocking — everything you need to plan your business in one place.
Already set up? Read the full guide on how to use Onyx Boox for business planning to build a weekly planning system that actually sticks.
Here is a video on how to install your digital Planner on Onyx Boox.